Tuesday, March 15, 2011

Tuesday Thrift Find and the Pandas

COME ON. EVERYONE'S DOING IT.
Everyone has a thrift store brass lamp find right? Well here's mine.

It was made to look like a candle holder and holds two light bulbs. And the bonus is that it works! The good thing about Goodwill is that they won't sell any electronics without testing them first. I love the little oval shade, intricate details, and the solid wood base. And just like everyone else who has one of these, I'm considering painting it. I know it will look great white, but I also know it looks great just the way it is. On the right table and with the right furniture around it, it won't looked dated. Next to other brass or dark pieces however, it'll take you right back to the 70's or 80's. We'll see if I give in like everyone else!

SNEAKY SNEAKY.
And here's a sneak peek of the fabric I will be using for one of my projects. Wouldn't you like to know what I'll be covering with this? I love the color and vintage pattern. To me, this is timeless.

WOW. THAT'S RANDOM.
And just for fun, at yet another recent estate sale Aine spied 3 little pandas and kept yelling and pointing at them. I usually try not to buy her any toys because like every other child out there she has way too many. But the owner told me all 3 of them were for $.50. Well how could I say no to that? So here are Aine's new favorite toys displayed in my brother's bamboo plant.

Weird, I know. But that pretty much sums up both our personalities.

Monday, March 14, 2011

What's French for jerk?

OH MY. OH DEAR.
My second French chair is being a bit of a jerk. This morning I used 120 grit sandpaper to smooth down paint in some of the thicker areas and continued to use it to distress the high points (I forgot to switch to the 60 grit sandpaper...yikes). Immediately afterwards I glazed it with Minwax dark walnut stain. Because my sanding didn't just focus on the high points and because I glazed right away, it left a ton of unattractive sanding marks all over the place. Another issue I had was with the distressing itself. The 120 grit didn't strip the areas down to the wood so I was left with the old speckled paint job peeking through. This made the chair look muddled and dirty after I glazed it. SIGH!

This picture doesn't show it clearly, but the old paint is showing through the white. The reason I distressed the chair in the first place was to feature the wood underneath. FAIL!

DOTH MY EYES DECIEVE ME?
So tonight I began repainting the chair back to it's original creamy white color. Although I wanted the chair to match my La Belle Premiere, I realized this chair looks better pure white. So I'm going to be diverting from my distressed white walnut-glazed look. YES! It's true! It's finally happening!

By the way, just a little tip on painting the cane weave on the back of the chair. Don't use your good brush. I used a cheapo bristle-y brush and it helped get the paint into the nooks and crannies. And although I won't be glazing the weave again, I would suggest for anyone else out there who tries it not to use the foam brush directly on the weave. Use the foam brush to sop up the stain but then dab the brush on a clean rag. Next, run the rag over the weave and then quickly wipe it off. I find that if you use the foam brush directly, the cane weave stains darker then the wood on the frame of the chair.


YEAH, I WAS WONDERING ABOUT THAT STUFF.
Hopefully the chair will be behaving tomorrow. By the way, I realized a few posts back that I didn't talk about any of the other items featured in the picture with La Belle Premiere. The nightstand is a tobacco cabinet and my first ever furniture project (as well as one of my first posts). The picture frame was previously mentioned in this post. I haven't found any artwork for it yet, but I'm considering framing one of the poems from the book A Garden of Girls that I purchased recently. The white birdcage was from the same estate sale where I bought my once beastly French Chair. Inside the cage is a vintage heart-shaped valentine of an acrobat on a horse one of my best friends sent me from Seattle. The little red car was made by my husband way back in the day when he was in Boy Scouts. My daughter Aine loves playing with it! Last of all, the brown leather suitcase was a garage sale find. I'll take another picture of it and post it tomorrow because it has really cool vintage airline travel stickers on it. Lately I've been wondering if the stickers are worth more than the suitcase!

Linking to:
PhotobucketDomestically Speaking


Sunday, March 13, 2011

So close I can taste it.

HEY SLACKER, WHAT EVER HAPPENED TO THAT OTHER CHAIR?
Remember my second French chair find?

I was thinking about it all last week and finally got some work done this weekend (in between going to the Rodeo, a birthday party, and running various other errands). Like my previous pieces, I cleaned it with Krud Kutter sanded it lightly with 60-grit sandpaper. Next I painted it with 2 coats of the usual Behr Interior Semi-gloss in Creamy White. Yeah, real original I know!

With the piping done (mentioned in this post), the next step was to cut the canvas drop cloth to cover the top and sides of the cushion
.
THANKS FOR ALWAYS MAKING ME FEEL BETTER ABOUT MYSELF.
Next I pinned the piping to the square piece of canvas that was to be the top of the cushion. I was so proud of my pinning job and was already congratulating myself, then realized I pinned it backwards. Agh! Moron! The piping should show on top and not be hidden when you're pinning it. In other words, the bottom portion of your piping fabric should be pinned to the top of the cushion fabric. Here's how it looked after I unhappily corrected it. And if you're wondering, no I don't have pictures of my mistakes. I angrily deleted them before I realized it might be helpful/funny for you all to see.
Next, I connected the piping in the middle at the back of the cushion. I forgot to take pictures of how I connected the piping, but I'll try to describe it as best I can. I took out a few stitches on both ends of the piping and then cut my fabric at a bias. Then I used a straight stitch to sew the two ends of fabric together. Finally, I cut the piping where the two ends met and then used the zipper foot to sew the piping together.


I didn't know if I should continue to use the zipper foot when sewing the piping to the cushion fabric, but I figured it would be easier because it would allow me to sew right next to the piping. The first picture shows the sewing on the underside of the piping and the second shows what it looks like from the other end (the piece of fabric that's lifted up is what I'll be sewing to the sides of the cushion.


SO DID YOU FINISH THE CHAIR OR NOT? SHOW ME PICS!
Just some advice, when you sew near where the piping connects, you may want to lift your presser foot and steadily push the fabric through the machine. Sometimes the fabric is too thick to fit under the presser foot and this helps. Of course, before you even start sewing you should always cut away excess fabric underneath that is not needed (I did this but still found the fabric to be too thick).

Next I sewed the sides of the cushions to my top cushion piece and piping. The first picture shows how I lined it up, initially I pinned the fabric then found that it wasn't needed.

Unfortunately, there's no "after" picture of the chair yet. I still need to distress and glaze the chair before I recover the cushion, staple it down, and add the trim. I'll also be adding some of the quilt batting I have to fill in some spaces. This chair originally had a pretty slouchy cushion though so I'm not looking to make it poofy.


Pretty cute cushion isn't it? It has potential! Hope everyone had a great weekend! Stay tuned for the reveal sometime this week!

Linking to:
Making

Saturday, March 12, 2011

A Garden of Girls

HOW DOES YOUR GARDEN GROW?
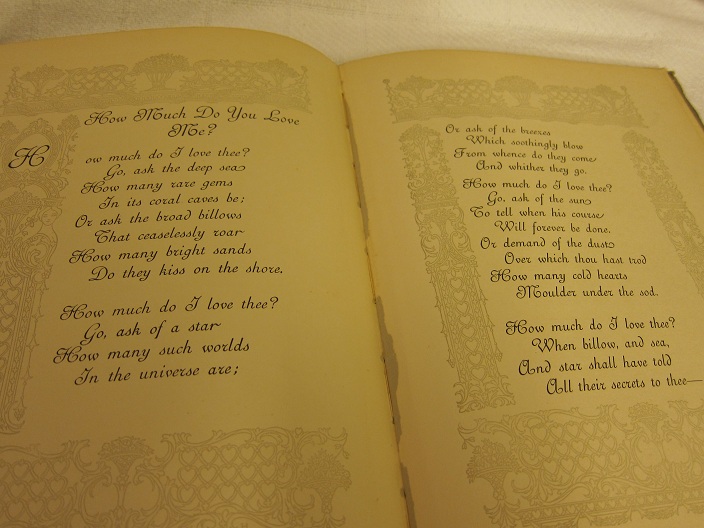
At a recent estate sale I picked up this book, A Garden of Girls. It's one of the most beautiful books I've ever laid my hands on and it didn't even have the artwork that originally came with it.

The book, published in 1910, is a collection of 32 poems from various poets and artwork by Harrison Fisher.  I wish it came with the color tipped-in illustrations, but the previous owner had taken them all out and framed them. They were selling one of those prints at the sale, but were asking $55 for it. No matter though. I loved the book for the poems and the patterns adorning each page.

Lovely isn't it? Some of the pages are falling out and because the artwork has already been removed, I'm considering framing a few of the poems. Some to keep and some to sell. I already have one antique frame that would match one of these pages beautifully.

Thursday, March 10, 2011

Piping like a boss

IS SHE NEW TO EVERYTHING?
At a recent estate sale, I did my best negotiating and got this chair for $8. They were originally asking for $40, but I went on the last day about an hour before they were about to shut down. The house itself was still filled to the brim with beautiful antiques and I was tempted to by a bureau and another chair while I was there, but I controlled myself and only walked away with this guy.

The chair itself was sturdy and in good shape but the paint was peeling from the weave and it looked like someone left an iron on the velvet blue seat cushion. For shame!

SHE DOESN'T TEAR FABRIC LIKE A BOSS.
I could make a slipcover for this armless guy, but that's not a look I personally like. Instead I'm going to upholster him. This of course requires learning to sew piping. I avoided piping for awhile because it looked like a pain in the ass. But after watching MMS' tutorial, I realized I was just being a wimp. It's actually as easy as it looks! It took me an hour and a half to complete the piping for the cushion, and most of that time was spent on changing the foot on my sewing machine and cutting the canvas into strips. Yes, I am using the canvas drop cloth again for my fabric. I want this chair to match La Belle Premiere. One thing to note if you watch the MMS video on custom piping, she suggests tearing the canvas and does it perfectly on the video. I tried tearing it and ended up with severely crooked and uneven strips of fabric. So not sure if it's just me, but if you don't have a steady hand...I suggest scissors.

Here's my piping. There's a lot more excess fabric then you're supposed to be left with, but I cut my strips really wide.

.

I feel like a piping success!

SPRING SPRUNG.
By the way, I keep seeing people post Spring pictures so here's my obligatory shot. The ironstone cup and saucer were a thrift store find mentioned here. The flowers were surprise from my husband the other day (and no he didn't do anything wrong...believe me I checked). And the book is Runaway Bunny from Aine's Aunt Jenny. It's one of her favorites!


Linking to:
Domestically Speaking

Wednesday, March 9, 2011

La Bete Premiere

WE CALL THAT IMPATIENCE.
My first frenchy chair was also my very first attempt at upholstery. I always wanted to take upholstery classes but never found the time. So when I found this chair, I decided to forget the classes. This needed to be redone right away! The MMS tutorial guided me through the majority of the process but for the more difficult areas, I referenced upholstery books I borrowed from the library.


WHAT THE WHAT?
We'll give my chair the name La Bete Premiere, French for "The First Beast" (at least I think it is). This is how La Bete Premiere looked when I bought her. She was a dirty girl.

First I unbolted the cushion of the chair and took out all the staples. Although I'm looking to get one of those staple lifter tools, I didn't have one on hand and used a small flathead screwdriver and pliers instead. My hands were sore the next day from all that prying and pulling.

The fabric on topmost layer of the chair that you see in the first couple pictures was a shimmery pastel blue (well shimmery was what it was back in La Bete Premiere's heyday). Underneath the blue was white damask. So so dirty.

HEY. THAT'S NOT OLD. IT'S JUST DIRTY.
Also as you can see from the bottom of the cushion. this isn't an antique chair. From the tag and stenciled numbers, I guessed this was probably from the 80's. This didn't affect how I felt about the chair though, I'm shallow and bought it for its looks! But for my future buyer out there, I tore off the tag and quickly painted the bottom so that it wasn't so ugly when they turned it over.

I was curious to know if the original foam and batting were salvageable and was excited when I got all of the staples out, but was disappointed when I found dirty batting and disintegrating foam underneath. The batting doesn't look so dirty in this picture, but it had stains and was totally limp and lose. Can't reuse that!

WAX ON. WAX OFF.
At this point the chair was ready to be cleaned and painted. As I mentioned in my previous post, there was wax all over the top of the chair and in the weave. I used 60 grit sandpaper to try to get it off, but it was futile. I went at it for about an hour then got frustrated and took a break. I started cleaning the rest of the chair with Krud Kutter and then a miracle happened. I found out exactly why everyone uses this stuff! As I started cleaning towards the top of the chair, I noticed that the Krud Kutter was taking the wax right off off the wood. Just a few wipes and I saved myself hours of frustration. I was elated! I didn't spend time taking the wax off of the weave though, it was too deep in the corners and wasn't worth the time. Once the wood on La Bete Premiere was de-waxed and clean, I ran sandpaper over her to get rid of any bumps and create a rougher surface to paint on.

I used my go-to paint Behr's Interior Semi-gloss in Creamy White. Because the paint also acts as a primer, I ended using a total of 3 coats. Again because the weave was dirty with wax, I didn't need to paint it. My plan was to upholster the back to cover the weave entirely.


Next I distressed the chair by hand-sanding all the high points. I think I did a much better job after learning from my mistakes on the tobacco cabinet! Keep in mind I didn't do this all in one day. Everything was done either while Aine was napping or when I should have been sleeping (somewhere between the hours of 9pm and 2am. I didn't get a lot of rest that week, but it didn't matter. I was too psyched about getting La Bete Premiere done!


SHE SOUNDS LIKE A NICE GIRL BUT MAN IS SHE CONFUSED.
Now that she was painted and distressed, I was ready to upholster La Bete Premiere. I went to Hobby Lobby and bought a piece of 2" thick poly foam and wandered around looking for high-loft cotton batting. Because this was my first upholstery job, I didn't realize that you had to get it online or at a specialty shop. I thought that HL would carry everything so when I didn't see it there, my impatience got to me again. I decided to get the next best thing and bought the largest roll of Hobbs Heirloom Premium Quilt Cotton Batting. I have to be honest here though, when I bought it I thought I was doing the right thing. I was confused on why the batting was so thin, but convinced myself that in the books and other pictures that it just looked thicker. Also I asked an employee at HL if quilt batting was what people used for furniture upholstery and I believed her when she said yes. What I didn't know was that she was partially right. For thinner cushioned areas, like the front frame of the chair, you should use the thin quilt batting. But for everything else you need the high-loft stuff.

This is NOT high-loft batting!
MOST PEOPLE WOULD HAVE STOPPED BY NOW.
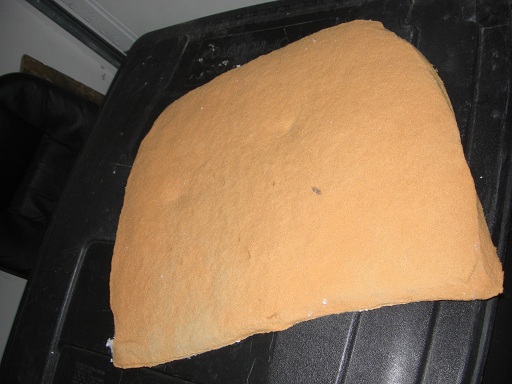
Although I didn't have the right supplies, I forged ahead and upholstered the chair. I cut the foam to match the shape of the cushion board. There were empty spaces so I filled it with the quilt batting. How did I do this with that thin batting you ask? I cut rectangular pieces of quilt batting and folded it up to fit the spaces. Resourceful, I know. And sorry, it was too hard to keep the batting in place and take a picture, so here's just a picture of the foam.
My upholstery fabric was canvas drop cloth from Home Depot. I liked the look of it on MMS' furniture and she was totally right, it was a lot cheaper than the majority of fabrics out there (about $20 for a 9'x11'). I put the canvas through the washer and dryer but didn't bleach it. The natural color is more my taste. Once it was clean, I cut a square off that was slightly larger than the cushion board and ironed it flat. Next I turned my cushion upside down on the fabric, and went to town stapling the fabric on with an electric stapler. It was my first time using one and I didn't like how I had to use 2 hands for stapling (1 for the trigger and the other to push the top of the stapler down), but it is pretty satisfying to hear the whack and see my fabric all snug on the board.

La Bete Premiere is looking more attractive isn't she?

WOW, ROOKIE MISTAKE. I FEEL SO MUCH BETTER ABOUT MY OWN SKILLS NOW.
Next up was reupholstering the back of La Bete Premiere. I tried to fold my quilt batting to fit the back area but it was too lumpy. I remembered reading somewhere that you could pull apart batting, so I tried doing it with the quilt batting. I know. Really weird Emily. Let me tell you that quilt batting does not really come apart and I ended up having a whole bunch of little squares of batting that I squished into the back frame. It looked terrible and I don't want to share the picture because I'm too embarrassed...but here you go.

Looks scary doesn't it? Yikes. Thankfully once I stapled the canvas (that I pre-cut and ironed) to the frame, it didn't look so bad. I considered myself lucky by this point.

The stapling was a bit of a pain because I wanted to make it even on both sides and I didn't want to cover up too much of the wood trim. I had to keep looking underneath the canvas to see where I was about to staple, but after awhile I got the hang of it and could do it by feeling the trim underneath the canvas. Next I cut around the canvas with scissors as closely as I could to the staples. Then I took some beige colored trim that I bought at Hobby Lobby for $.99 a yard and hot-glued it to the edges of the canvas making sure that I covered all of the staples. This was done very carefully to ensure that both sides were symmetrical and they matched the curves of the chair.

MAYBE SHE DOES HAVE COMMON SENSE AND LEARNS FROM HER MISTAKES.
Because I wasn't loving the method I used for the back of the chair, I went back to my original technique of folding batting over to cover the front frame. Much less batting was needed and I only had to cut a few extra pieces to cover the weave (you can see below on the top right corner where I added a few pieces).

Then just like I did on the back, I stapled canvas around the front and cut off the excess fabric. I hot-glued trim and then breathed a huge sigh of relief. I was DONE! La Bete Premiere was no more!

She is now La Belle Premiere (is that right? well it sounds pretty).

This is the first thing I see when I wake up now! She's in my corner of our bedroom (I finally got rid of some clutter). My first upholstery success! I love the beast that she was and the beauty that she is now.

Linking to:

Transformation ThursdayStuff and NonsenseFurniture Feature Fridays