Tuesday, July 26, 2011

Cat Anatomy Served on a Small Silver Platter

Technically it's served on a few platters. Is the thought too disgusting for you? Well don't shut your eyes, I promise it isn't that bad.

See? You can trust me! I took a few drawings from the Comparative Anatomy Lab Manual I picked up from an estate sale and modpodged them on 3 small silver-plated plates I found at a thrift store.

Weird? Yes. Interesting? I think so! These will one of the many unique items I will be listing at the Lovely Beasts Etsy shop. Opening Day is in a couple weeks!

SCIENCE!

Loving,
Emily

Linking to:
Photobucket

Saturday, July 23, 2011

Respite and a Lovely Girl

I haven't posted in a few days nor have I created anything new, but it was a well needed break. My creativity was hitting an all time low and I knew I was getting close to being burnt out. So now that my mind and body have rested, I hope to have a couple things to show you early next week. Hooray!

I'm also in the process of building an inventory of small items to open an etsy shop. I don't know if everyone likes selling or has been successful on etsy, but I'm really interested in trying it out and seeing what it will do for me. If you have any advice, I'd welcome it!

And just to make sure this post isn't all words, here's a book I bought at a yard sale awhile back. The cover really spoke to me.
I'm serious when I say she spoke to me. She was the inspiration to a more permanent drawing...a story for another day!

Loving,
Emily

Monday, July 18, 2011

Small Shiny Finds

I went with my thrifting partner-in-crime on Saturday to a couple shops in the Houston area and only came back with these 3 little silver-plated plates. Well I bought a couple shirts too, but no furniture or any ooh-ahh items. 2 of the plates are badly tarnished, but that's not a problem because they're get covered up with what I have in store for them.


The mirror tray was an estate sale find last weekend. It's pretty as is so for now I'll keep it as a mirror, but I think it'll eventually find itself with a different bottom. Or a different color frame. The possibilities are endless!
 

That's all to report from the thrifting front line :). Can't wait to see what you all found!

Sunday, July 17, 2011

Picking Up Where I Left Off

No, I haven't forgotten about my freebie dresser! It's been about a month since I've worked on her, and everyday I walked by her I reassured her (and myself) that I would return soon. She looked like this when I picked her off the curb.

I felt bad telling her that since she was a keeper, I didn't need to finish her right away. But I'm back as promised and here's what she looks like after a few days work (just catching an hour here and there during Annie's nap or bedtime).
 

Doesn't look like much progress, but she needed a lot of cleaning and paint. And I'm pretty sure painting takes twice as long when you're working in a garage in Houston and it's in the high 90's. Sweat, cockroaches, and mosquitoes also tend to cut your work time short. By the way, when you leave a dresser in the garage for a month, dust builds and critters nest. I had to clean her out all over again and vacuum all the dust trapped in the nooks. And she might have been closer to being finished if a good amount of my time had not been spent reorganizing my work space in my brother's garage. My tools, rags, and paint cans were strewn all over the place and it was driving me crazy, but somehow I forced myself to ignore it. Then yesterday I decided I couldn't deal with it for another day. Now everything is neatly piled in drawers and baskets. I've discovered I have about 15 slightly used rags whereas before I had trouble just finding 1! Hurrah!

Isn't it funny how spending a little time to clean and organize can make you happy and excited to create more?

Loving,
Emily

Thursday, July 14, 2011

A Rolling Dictionary

Whew! She's all done. I was going for the dry brush look, but ended up with another grey glazed piece. Oh whelps! The dictionary pages on the top and the twine knob make it more ME.

You saw how she started out in my last post, so here's what she looked like after my attempt at dry brushing.

Looks decent in the pictures, but in person it was a mess. I think because of the boxiness, the dry brush look just made it look like I was a lazy painter. I added 2 coats of Sherwin Williams Grey Screen on top of the paint I mentioned in this post to prove I wasn't a slacker. Next, I brushed on Minwax Dark Walnut stain. Apparently I have a new method because every time I add stain, I think I've gone too far and I dry brush over it to get the perfect glazed look. You may remember I did the same thing with my cottage headboard. I guess it's what works for me!

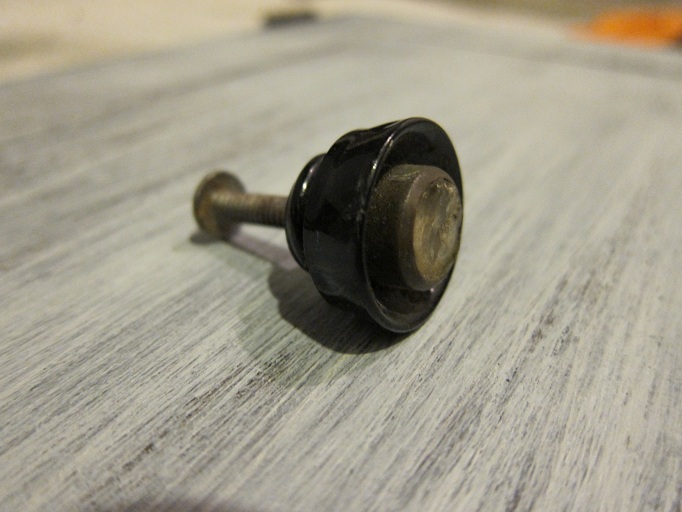
Much better! And sorry to disappoint, but I re-did the burlap knob you all loved. It just didn't look right with this cabinet. I considered buying a new knob, but reminded myself that one of my main goals for refurbishing furniture was to reuse and make do with the supplies that I had on hand. I tore off all the burlap and removed the dried up hot glue from the knob using denatured alcohol. I was back to this.

I went through several possibilities to redo the knob to match the cabinet: Use a glass wine cork (but that required cutting or drilling glass), glue on a glass stone (but the stone was too small and looked odd), wrap it in twine...that's it! I just used some twine recently to wrap this wire bottle carrier. I tied a knot in a piece of twine and hot glued it to the center of the knob. Then I slowly wrapped the twine around and around using hot glue as I went. Perfect!

Now that the knob was taken care of, I had to decide what to use to cover the top of the cabinet. The wood on top was in decent shape, but I knew it was missing something. It needed the "Emily" touch :)! So I found a dictionary from the 50's that was falling apart and mod podged pages on top. I used a foam brush and made sure to put glue both on the wood and on the back of the dictionary pages. I think it turned out beautiful! And no bubbles! I used a old plastic insurance card to smooth the paper out. I know a roller works better, but why buy one when I have a free handy little tool around the house.

Apologies for the craptastic photos. I didn't have time to take pictures during the day and I wanted to post the reveal tonight. So if you can deal with it, here are more crappy pictures of my favorite pages/words/pictures on the cabinet.

Hee hee! The goatee man never fails to make me laugh. After another layer of mod podge on top, I used a rag to apply some wipe-on poly (waiting about 4 hours in between). I also rubbed clear Briwax on the rest of the cabinet. Annnnnd...DONE!


A happy way to end the week. Can't wait to link up! See you all there!

Loving,
Emily

Linking up at:
Stuff and NonsenseFurniture Feature FridaysPhotobucketDomestically Speaking

Wednesday, July 13, 2011

I Don't Know How You Do It

...but I can't post every day. I tried, I really did! I think if you're able to write a coherent and interesting post every day, you're magic. I lose about an hour of sleep each time I write a post, and on average I only put up about 3 a week. Weak, I know. Oh well! If I can't provide quantity, hope I provide quality! Or at least some amusement.

Today is just a little post to lead up to the reveal of this rolling cabinet tomorrow night.

I finished modpodging and a bit of distressing tonight, and tomorrow I'm adding the finishing touches. Until then, I'll show you a little fix I did on the door. It was one of those annoying doors that you have to pull up and out in order to open. My sometimes-he's-a-genius husband discovered that not only was the wood warped from the heat, the top hinge was bent. You might be able to tell in this picture.

I couldn't do anything about the warpiness, but I could try to take on that evil hinge! After removing the door and taking off the top hinge, I hammered the metal straight from both sides. It looked good, but would resolve my door issue???

Yesssss! It worked! The door closes beautifully. Like butta! And of course I remembered to take a picture after I screwed the hinge on, so hope you can tell the hinge is straight now! 

See you all tomorrow! 

Loving,
Emily

Sunday, July 10, 2011

Curbside Save of the Week: Wingback Chair

My husband let me do a little yard/estate sale shopping on Saturday while Annie was napping and although I didn't find anything at the sales, I did get this wingback chair off the curb for absolutely NOTHING! It was a freebie! Hurrah!

I've seen several wingbacks in similar condition at thrift stores for prices ranging from $25-125 , but I was never willing to spend the money for both the chair and the upholstery work. Plus, most of the wingbacks weren't vintage. They were usually only about 5-10 years old. I almost picked one up off the side of the road for free a few months ago but when it was halfway into the car, I quickly took it back out because of all the fire ants crawling over it. I also realized that replacing the missing cushions would put me over budget on the redo.

So when I saw this purple one in decent condition, smoke-free, pet-smell-free, and cushion intact I figured I had nothing to lose! I mean it was free! And although it wasn't vintage I didn't mind because again, I didn't spend a penny on it. It will likely take me a few months to reupholster the chair, but I'm in no rush. If I want it to be close to perfect, I'll have to take long extended breaks in between each upholstery stage so I don't get sloppy or sick of it.

And as an update on the rolling cabinet, I'm done painting and will be glazing it soon but have decided it needs more character. So there will be some modpodging work on the top. I hope that'll give it the kick it needs to look like an "Emily" redo! Here's a progress pic on the paint. I added a coat of Sherwin Williams Grey Screen paint but it no longer looks like dry brushed, it now just looks grey. Oh well! I still like it!