Friday, April 1, 2011

Antique Fair tomorrow and a Castle

YOU BETTER TAKE A BAJILLION PICTURES!
I was going to ask you to guess what I was doing tomorrow, but duh...my title gives it totally away. I'm unbelievably excited to go to the Round Top Antique Fair! My first time! Actually, I'm going to the shows in Warrenton, TX thanks to some tips from both Lorie from Wool & Flax and Diane from Home Sweet Homemade. My birthday is coming up and I asked my husband to bring me there as a present. I also asked my parents to watch Aine while we are away. Best birthday gifts a newly addicted refurb mom (and longtime antique addict) could ask for! And of course I'll probably buy a few more birthday gifts for myself while I'm there...

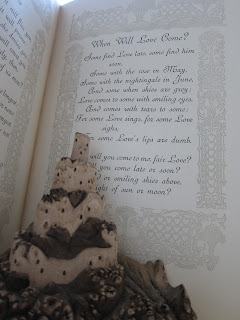
I promise to take beautiful pictures tomorrow, mostly of things I wish I could afford. But for today I'll just  post pictures of my beautiful collapsible wood castle!

TA DAAAAAA!

Thursday, March 31, 2011

Two chairs down, two to go

DID YOU PHOTOSHOP THIS TO MAKE IT LOOK LIKE YOU FINISHED TWO?
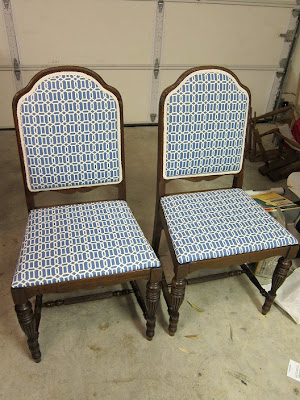
Tonight I finished my other "Blue Boy" chair! Yay twins! Soon to be quadruplets.

Again, here's what the chair looked like before.

And after! Maybe happily ever after if I'm able to sell the dining set.

If you missed the post on what I did, you can get to it here. By the way, I forgot to mention that the 4th chair is a little bigger and has arms. So maybe 3 of the quadruplets are identical and the last is fraternal. The black sheep of the family!

Linking to:
PhotobucketChic on a Shoestring Decorating

Wednesday, March 30, 2011

Little table with a new look

WE ALL SAW THIS COMING EMILY
As promised, I took more flattering pictures of my little white table.

You'll notice that the table doesn't look the same as it did on Monday. Ah, well...that's because the sandpaper fairy came by for a visit. There were a couple areas on the table I wanted to smooth down and after a little sanding, I realized that the whole piece would look better distressed. Not only to show-off the details, but also to make up for some of it's faults. Two corners on the curves of the table had previously broken off and glued back together. It was like this when I got it and unfortunately when the pieces broke off, the wood chipped on one side. From certain angles, you could see a small gap where the wood was missing. I tried to paint the inside of the gap white to make it look more seamless, but it wasn't enough. The brown wood was still clearly showing. So instead, I distressed the piece lightly so that the eye doesn't focus on the gap or the glued area. And no, I'm not going to glaze the piece this time. Instead I'm just going to rub some clear Briwax over it. I'll probably get to that tomorrow.

So here's the table with a little face-lift. More like a teeny tiny painless injection.

I DON'T EVEN HAVE TO ASK WHAT'S IN THIS PICTURE BECAUSE I KNOW YOU'RE GOING TO TELL ME ANYWAY.
In case some of the items don't look familiar you might remember Le Baron, the French chair I re-upholstered a few weeks ago with canvas drop cloth. The creamer, ironstone plate, and bronze lamp were thrift store finds I posted about before. And see what I meant about that lamp? It doesn't need to be painted white. The bronze looks great as is! A Garden of Girls was the book of poems I purchased at an estate sale and that castle...well that's one of my all-time favorite purchases. My husband and I bought it a couple years ago at the Artisan's Craft Fair held at the Codman Estate in Concord, MA. The woman who made these takes the roots or knotty parts at the bottom of trees, cleans them up, and makes circular cuts in them. When you pull up the layered cuts, a castle appears! To me it looks like a oceanside castle on a rocky hill. Lovely isn't it? When you collapse the layers, it looks like a beautiful gnarled piece of wood. I'll show you more pictures of the castle tomorrow.

And just for fun, I decided to take a couple pictures of what it would look like if my husband added a little something to decorate the table.

Yup. Nothing beats reading poems with some nice Irish Whisky.

Linking to:
mommahenscoopTransformation ThursdayFurniture Feature FridaysPhotobucket

Tuesday, March 29, 2011

Tuesday Thrift Find: Creamer and a Curtained Shelf

WHAT'S THAT THING IN THE BACKGROUND? IS SHE GOING TO USE IT FOR PUPPET SHOWS?
Today while Aine and I were visiting my mom, we stopped at a couple thrift stores and I went home with these two things!

The little white pitcher is a Pfaltzgraff creamer in their Heritage pattern. I'd love if it was an antique, but I'm fine that it's not because I got it for 50 cents! And guess how much I spent on the other thing? The best way to describe it is a wood-curtained shelf. So what do you think? Ready? 50 cents! These aren't things I had to have, but how can you walk away from a price like that? I bought them both from the same place and we were lucky that the thrift store was having a 50% off sale on housewares that day. I mean $1 for each is a great deal, but $1 for both is unheard of!

Now, what to do with the shelf? The fabric is off-white with a small blue flower pattern and it looks brand new. No need to replace it! So should I put magazines in it? Use it as a bathroom caddy to store lotions and soaps? Put little potted plants in it? Wait until Aine gets a little older so she can use it as a doll crib? Or maybe we could hang it upside down as a curtain valence for her future play kitchen? And of course, yes, I could use it for puppet shows. So many possibilities for just 2 quarters. I think everyone can agree that these are the thrifty deals that we live for!

Monday, March 28, 2011

Sewing Drawer Teacup Cupholder

I BET YOU WERE THE LAST ONE WITH A SLAP BRACELET WHEN THEY WERE POPULAR.
A lot of people have been into sewing machine drawers for awhile now and I know I'm a little late to the party, but better late than never right? I bought one drawer with the hope that I'll be able to find a matching one and a rack to put them in sometime in the future. This particular drawer was not a beauty when I first came upon it. It was slowly dying of suffocation from the ugliest shade of brown paint I've ever seen. I have a feeling the previous owner had never heard of wood stain and thought that they could brighten the wood of the sewing table by painting the whole thing a wood-color. I hope they were happy with the results because if I saw the whole antique table in this shade of brown, I'd puke a little.

Thus began my first stripping adventure using Motsenbocker's Liftoff which I saw recommended on Miss Mustard Seed's blog. It's a water-based stripper in gel form and can be purchased at Lowe's. I applied it thickly with a cheap paintbrush on the sides of the drawer right over the hideous brown paint. 15 minutes later I scraped it off with a paint scraper followed by a few hard wipes with a rag.

It took about 2-3 applications to finally get it all off. Quick suggestion, don't wait more than 15 minutes or the paint-gel combo gets sticky and starts to dry out. If you wait the recommended amount of time, it's sticky but in a wetter form and easier to take off. After the final application was scraped and wiped off, I waited for the wood to dry before taking 60-grit sandpaper and hand-sanding it down.

LOOKS PRETTY NICE. WHY DON'T WE JUST STOP THERE.
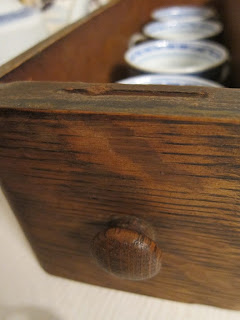
I actually liked how the naked wood looked, but figured the drawer would look a little classier with some wax. I had some dark brown Briwax on hand and used a clean cloth to rub it on the drawer. I used another cloth to lightly wipe it down afterwards to get rid of any excess. This is only the second time I've ever used it, but I really love how the wood looks afterwards. All polished up with that luster-look that everyone's always talking about and I didn't have to deal with a wood-stain!
It's pretty hot here in Houston so the wax melted a little. If this happens to yours, put it in the fridge for about 15 min and it should harden right up!

Right now I'm using the drawer to hold our tiny Chinese teacups. The cups and teapot aren't antique, but I think when they're this cute you can look past that! Here they are all lined up in a row...

But mid-way through this post I had a revelation and went back to take pictures of them stacked on top of each other. They don't stack well because of those little handles and I could probably use 4 more to make better use of the drawer, but look at this:

I don't ever say adorable, but this might be what it would look like if I acted the word out with props.

Linking to:
MakingMy Uncommon Slice of Suburbia PhotobucketTransformation Thursday