
EMILY HAS BRAIN?
The second Frenchy is DOOOOOOOONE! Here's the exciting side-by-side shot that you've all been waiting for.

Whew! Most of the sewing was new to me so I had to use my brain a lot on this one. That can sometimes be a problem, lucky for me my brain was running at full capacity tonight. You remember this chair I first mentioned in this piping post? Let's call him The Baron, which in French is Le Baron. I don't even know French. Impressed aren't you?
I purchased Le Baron at an estate sale for $8. The speckled paint was peeling off and sadly someone had left an iron on the blue velvet cushion cover. Here's what my brother's pug thought of the cushion.

The cushion was hot-glued to the chair so I peeled it off and found the cotton batting and foam underneath in great shape. Hooray! Finally it's coming up Emily! I always prefer reusing materials because it creates less waste and hey, it saves you money

NO DISTRESSING? I DON'T EVEN KNOW WHO YOU ARE ANYMORE.
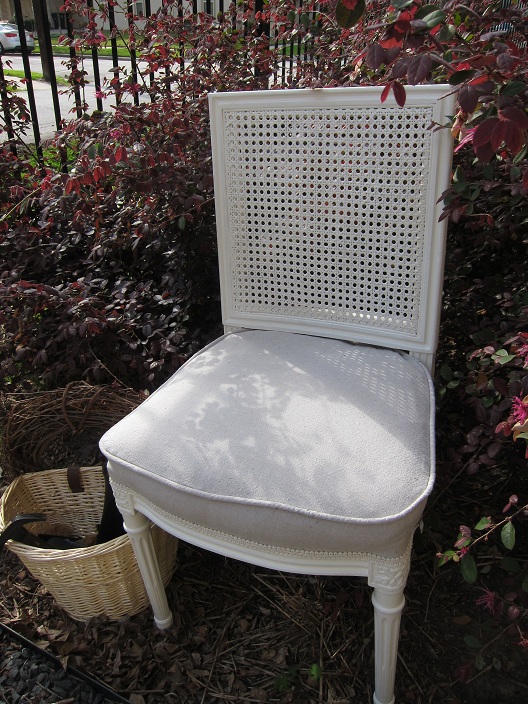
Starting with the chair frame, I decided to paint it Behr creamy white. I attempted to distress Le Baron but as you already heard here, he wasn't having any of it. Instead I kept him pure.

Once the cushion cover was ready (mentioned here), I put a layer of quilt batting over the existing cotton batting to create a smoother surface.

Next I turned it upside down into my cushion cover and adjusted the batting and foam to make it even.

AH! EMILY'S MISTAKES. THESE ARE ALWAYS AMUSING.
Once I placed the cushion on the chair frame, I cut the back corners to make the fabric fit around the frame. I was planning to hot glue trim around the edges so I wasn't worried about frayed fabric, however I realized that I was a little off when cutting the corners. Sigh! I was left with huge gaps on both sides. Thanks to my now useful brain, I decided to sew two strips of trim side by side to cover it up. It may not be perfect, but it would still look pretty.

Another issue I had was with the ends of the fabric at the back of the cushion cover. I cut off the fabric too soon and didn't realize that you need to have excess fabric where the ends meet. It doesn't matter if you pinned and measured ahead of time, once you put the foam and batting in the cushion cover the fabric gets stretched out and you need to have extra fabric to make the ends meet. So the back of my cushion ended up looking like this. To me it looked fine but to some of you perfectionists out there, I bet you're already trying to mentally correct my offensive stitches.

My favorite part was next. Stapling and gluing trim! I started with one staple in the middle of the front part of the cushion, followed by one in back, one on the right, and one on the left. Then I continued with 2 staples in front, 2 in back, etc. You get the idea. This made my cushion fabric stretch out more evenly on the seat of the chair. Once the excess fabric underneath the staples was cut off, I was ready to hot glue. Woo!


I THINK SHE SHOULD HAVE GONE WITH THE WHITE.
I had two kinds of trim, white and beige. I took pictures of what they'd look like before I settled on the beige. The weird thing is, the white looks better in the pictures because the paint on the chair looks white, but when you look at the chair in person the paint is off-white and there's too much of a contrast between the two.


The first thing I hot-glued was the extra pieces of trim I was adding to the gaps in the back.


Then I added the rest of the trim to line the edges of the chair. I love the way it looks, especially near the corner details.


SHE SEEMS TO REALLY LIKES THE WORD BUM.
I think a lot of the credit for this chair goes to my husband who let me work on her every night this past week. I know I drove him crazy with all the paint specks around the sink and noisily going in and out of our room while he was sleeping, so here's a big public "THANK YOU!"
And now for more pictures! Le Baron is ready for bums near and far. He'd like a bum on him near a desk, or perhaps a dressing table, he'd enjoy one with a bottle of wine...oh he's so versatile!


Linking to:


Yay for you! Chairs looks much better... and more usable.
ReplyDeleteLove your chair! You did such a great job!
ReplyDelete-emily
nestnestiongnested.blogspot
Thanks for stopping by my blog!! So nice to meet you. I love your blog and am your newest follower, too! (via RSS feed) Hope we can celebrate our one year together! The chair looks awesome! I love the tutorial describing how you did it. By the way, I'm from Houston. :)
ReplyDeleteLe Baron looks fabulous now! You did a great job. It is so much fun to transform ugly ducks into treasures! I'm a new follower and fellow new blogger. Would love to have you stop by blog sometime.
ReplyDeleteYour chair looks really beautiful, you did a fabulous job! I love that type of cushion look!
ReplyDeleteGlad everyone liked the chair! My next project is a big one, but I promise it won't be white and it's not a Frenchy chair. Can't wait to show you all!
ReplyDeleteHi Emily...
ReplyDeleteBRAVO for you, my friend! I think your frenchy chair turned out beautifully! And...I don't care what anyone says...reupholstering is not easy or for the faint of heart!!! I'm thinking that maybe...and the key word here is "maybe"...after doing a hundred chairs or so...upholstering might become an easy project! I have a couple of frenchy chairs that need upholstering and I have put off the project for lack of experience! You have inspired me, my friend! I love your frenchy chair!!!
Warmest wishes,
Chari @Happy To Design
you did a spiffy job...that transformation is truly gorgeous...so glad you linked up to fridays unfolded!
ReplyDeleteblessings,
alison
stuff and nonsense
Fantastic chair!! I love Le Baron!! He is gorgeous~ Well done!! Thanks for sharing at FNF! :)
ReplyDeleteGreat job, Emily! Thanks for linking up your great tutorial with VIF! You make it look easy!
ReplyDeletehugs,
Debra
Beautifully done! Thanks for all the pictures. It really helped to see and understand how you did the project.
ReplyDeleteWhat a lovely transformation! New beginnings for an old chair. Great job.
ReplyDeleteCindy
Hi Emily! I don't think my brain is EVER running at full capacity so that was almost as impressive to me as the gorgeous chair transformation! LOL! But, really, it is just so beautiful and adding that trim gave it the perfect touch of elegance. Thanks so much for linking this one up to Inspiration Friday and we have been so thrilled to have you as a new bloggy friend! :-)
ReplyDeleteVanessa
Emily,
ReplyDeleteThat turned out beautiful! I love what you did with that. Very chic! Thanks for linking up!
Sherry
Really good job I love chairs and this one is really nice.
ReplyDeleteYou have totally ROCKED that chair!
ReplyDeleteI made a slip cover for a wing back earlier this spring and I was "over" the sewing thing but I must thank you for inspiring me to get back at it.
The finished product is so worth it!!! I'm glad you visited my blog so I could find yours!!!