Showing posts with label dictionary. Show all posts

Thursday, August 25, 2011

Industrial Pentagon Glass Box

Remember this thrift store purchase I showed you earlier this week?

These types of glass and brass boxes are my favorite things to work with. I used to think they were so ugly! Back in the day a lot of people used to use them in their bathrooms to hold cotton balls, etc. But they're the perfect thing to transform! With some help from modpodge, vintage dictionary illustrations, and twine the sad-looking beast turned into this.

The illustrations on top are of a siphon-bottle, stereoscope, printing press, stocks, and a torturing rack. On the bottom is a beautiful drawing of a four-masted schooner. It might seem odd to put all these pictures together, but I like putting the industrial together with the whimsical!

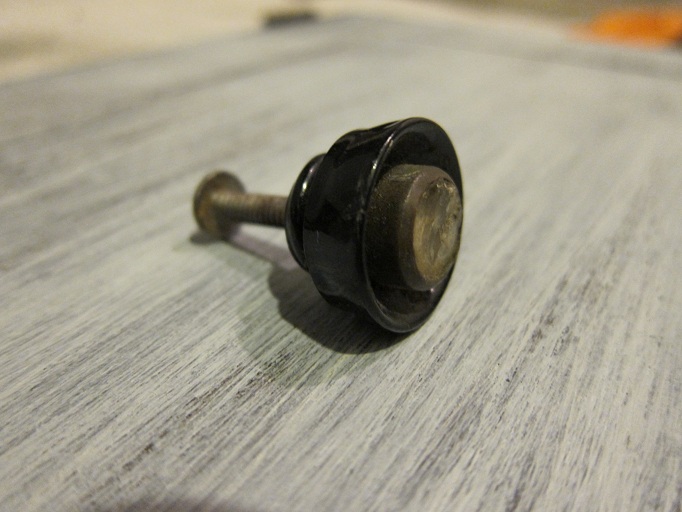
You may have noticed that when I bought the box, part of the knob was missing. So I did what I usually do with my salvaged creations! I wrapped it up in twine. 

This box is now for sale in the Lovely Beasts Etsy shop!

And if you're wondering how the shop is doing, I've already had 7 sales which is better than I had hoped! What I'm finding out is that vintage finds do better than my little recycled or salvaged creations. This is great news for me though! The whole purpose of my Etsy venture was to see what would sell best anyway. This process has helped reaffirm the fact that I do have an eye for vintage objects and what people want in that department. And I do enjoy making my little creations, but now I know where I can focus my time if I want to sell more successfully on Etsy. Estate sales here I come!!!

Love the Beasts,
Emily

Thursday, August 11, 2011

Greeted By Features

Yesterday I was completely out of commission. The flu struck. I was feeling it earlier on, but Wednesday was the day of suffering. Headache, chills, fever, nausea...I'm pretty sure our darling daughter gave it to my husband, who in turn gave it to me. Thankfully, we didn't all have it at the same time. And, I'm lucky because I think I am recovering from it more quickly than the average person. Sleep was the key. It came in the form of my husband and brother. They looked after Annie while I caught a nap here and there (my husband came home a few hours early and my brother was working from home). I'm still recovering today, but felt well enough to get back on the computer. So, I was totally surprised when I came back to the blog word and received a very warm welcome. Two welcomes actually. Lovely Beasts was featured twice! Hurrah!

Judy at DIY by Design was so sweet to feature my Dictionary Napkin Rings. She even mentioned my Etsy shop opening! Thank you thank you Judy!

And Shaunna from Perfectly Imperfect, one of the most informative and inspirational furniture blogs out there, featured my Freebie Dresser Redo. She did it in such a special way, I wasn't sure how to thank her! I did of course, it took about 5-6 thank yous in all.

Not a bad way to bounce-back from the flu, eh? Thanks again to the amazing women, Judy and Shaunna, for featuring my blog!

Sunday, July 31, 2011

Monocles, Velocipedes, and Etsy Gift Tags

Here's another fun item I finished for my soon-to-be-open Etsy shop. They're dictionary brass napkin rings!


The pages were taken from a 1960's Thorndike Barnhart Dictionary which have the most awesome vintage illustrations. For the 4 brass rings, I chose the words "beaver," "monocle," "sideburns," and "velocipede."
 

I love how they turned out! And here are a few gift tag creations I've been working on for Etsy. I'm planning to give a few away with each purchase from the Lovely Beasts Shop. 

I had too many business cards that I knew I would never use, so I re-purposed them. I used the same dictionary pages and ran them through the printer, glued them to the cards, and came up with this!

I really enjoy working on all of these projects and I probably have too many things going on at once, but I can't help it. There's no stopping this train. MUST KEEP CREATING!

Linking to:
The DIY Show OffPhotobucket

Thursday, July 14, 2011

A Rolling Dictionary

Whew! She's all done. I was going for the dry brush look, but ended up with another grey glazed piece. Oh whelps! The dictionary pages on the top and the twine knob make it more ME.

You saw how she started out in my last post, so here's what she looked like after my attempt at dry brushing.

Looks decent in the pictures, but in person it was a mess. I think because of the boxiness, the dry brush look just made it look like I was a lazy painter. I added 2 coats of Sherwin Williams Grey Screen on top of the paint I mentioned in this post to prove I wasn't a slacker. Next, I brushed on Minwax Dark Walnut stain. Apparently I have a new method because every time I add stain, I think I've gone too far and I dry brush over it to get the perfect glazed look. You may remember I did the same thing with my cottage headboard. I guess it's what works for me!

Much better! And sorry to disappoint, but I re-did the burlap knob you all loved. It just didn't look right with this cabinet. I considered buying a new knob, but reminded myself that one of my main goals for refurbishing furniture was to reuse and make do with the supplies that I had on hand. I tore off all the burlap and removed the dried up hot glue from the knob using denatured alcohol. I was back to this.

I went through several possibilities to redo the knob to match the cabinet: Use a glass wine cork (but that required cutting or drilling glass), glue on a glass stone (but the stone was too small and looked odd), wrap it in twine...that's it! I just used some twine recently to wrap this wire bottle carrier. I tied a knot in a piece of twine and hot glued it to the center of the knob. Then I slowly wrapped the twine around and around using hot glue as I went. Perfect!

Now that the knob was taken care of, I had to decide what to use to cover the top of the cabinet. The wood on top was in decent shape, but I knew it was missing something. It needed the "Emily" touch :)! So I found a dictionary from the 50's that was falling apart and mod podged pages on top. I used a foam brush and made sure to put glue both on the wood and on the back of the dictionary pages. I think it turned out beautiful! And no bubbles! I used a old plastic insurance card to smooth the paper out. I know a roller works better, but why buy one when I have a free handy little tool around the house.

Apologies for the craptastic photos. I didn't have time to take pictures during the day and I wanted to post the reveal tonight. So if you can deal with it, here are more crappy pictures of my favorite pages/words/pictures on the cabinet.

Hee hee! The goatee man never fails to make me laugh. After another layer of mod podge on top, I used a rag to apply some wipe-on poly (waiting about 4 hours in between). I also rubbed clear Briwax on the rest of the cabinet. Annnnnd...DONE!


A happy way to end the week. Can't wait to link up! See you all there!

Loving,
Emily

Linking up at:
Stuff and NonsenseFurniture Feature FridaysPhotobucketDomestically Speaking